DIY: Legwarmers

Winter weather can inspire some great DIYs.  I’ve been wanting to make legwarmers for awhile now and figured out a simple way to do so.  This sweater was in my donate or remake pile and it finally found new life!  Check out my step-be-step to make the sleeves of an old sweater into legwarmers.

LEGWARMERS B+A

LegWarmers

1. Rip out the seam between the sleeve and the sweater.

2. Using a razor blade and pulling the layers apart can make the process faster.

3. Measure up leg from from ankle to determine where you want the top of your leg warmer.  Mine was 14 inches.

4. Add 2 inches to previous measurement and mark distance up from wrist on sweater sleeve.

5. Draw a line across sleeve and cut.

6. Fold cut edge over 1 inch, iron, and fold over again to create hem.  Pin down.

7. Set sewing machine to a zig-zag or stretch stitch.

8.  Stitch hem down close to edge.

Enjoy!

IMGP3218

XO-Lauren

Inspiration: The Grammy’s

I love award season because it means tons of fabulous gowns all in one place.  This year’s Grammy’s did not disappoint and there was one trend that I think could easily become a fun DIY.

The use of sheer accents on dresses is a good way to show skin while still technically being covered or to spice up a monochromatic garment.  Each dress below is a single color, but the use of sheer fabric in strategic places gives unbelievable depth to all of them.  I would love to try this trend on a simple t-shirt or outdated top.

Grammys Inspo

Do you have any ideas for adding sheer elements into your wardrobe?

XO-Lauren

Loving Lately

I’ve made it a goal for this new year to try to appreciate the little things in life.  For me, the easiest way is to figure out what I’m loving right in a moment.  A lot of them are dorky, cute or random but I think they’ll give you an insight into my life and what makes me happy.  Enjoy!

IMGP3112

Two little jars I’m planning to use for an upcoming Valentine’s Day creation.

IMGP3115

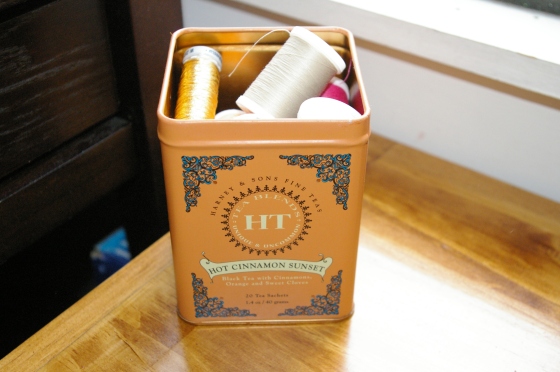
An old tea canister finding new use as thread storage.

IMGP3119

OPI polishes in pretty colors to get me through this long winter.

IMGP3152

Infusing vodka with fresh fruit for a little present.

XO-Lauren

DIY: Paper Heart Garland

With Valentine’s day right around the corner, I wanted some fun and simple decorations to spice up a plain wall in my bedroom.  This project was super easy and would work well for multiple occasions.  I used colored paper in pastels that I thought would compliment my dark grey wall and that could be left up even once Valentine’s Day is over.  It was the perfect project to cover a large amount of wall with supplies I already had on hand!  Enjoy!


Heart Garland

Heart Garland 2

1. Supplies: Multiple colors of card stock, cookie cutter, scissors, thread and sewing machine

2. Trace the cookie cutter on the backside of the card stock.  Cut out shapes on about three sheets at once.

3.  Cut enough hearts for your desired length.  I cut out 98 small hearts for two garlands.

4. Organize hearts in desired order of color.  You could do a repeating pattern like I did or just put them together randomly.

5. Sew hearts together one after the other.  Remember to increase your stitch length to avoid ripping the paper.

6. Hang on wall with push pins and enjoy your creation!

XO-Lauren

Posted in DIY

DIY: Restoring Old Candles

Hello! I know there has been a huge delay in posts, with finals, winter break and everything else the blog got put on the back burner.  I’m trying to start but up again and have a simple and easy DIY for you!

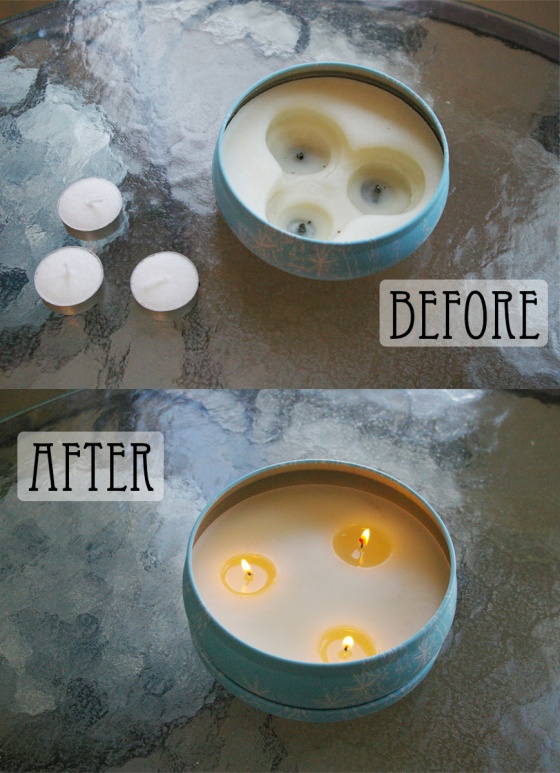
This has been my favorite candle for a while and as I was enjoying it a few days ago, it burnt out.  There was still plenty of wax left but the wicks were gone.  I could have easily thrown it out a moved on to another but I thought I’d try to restore it instead! Luckily, this worked amazingly well and now my candle looks like new.

Enjoy!

Candle B+A

Supplies:

Old Candle

Candle votives

Pot with water
Candle Redo

1. Fill a pot large enough to fit your candle with a few inches of water.  Place candle in water and allow to simmer.  The wax will begin to melt down pretty quickly and remove the old wicks when you can.

2. Continue to melt the wax.

3. Remove from heat and place votive candles (with metal bottom removed!) into wax evenly distributed.  I used a silicon tongs to hold onto the wick and slowly place it into the wax.

4. Light your finished candle and enjoy:)!

XO-Lauren

Posted in DIY